It's cheap, It's cranky, it's made in China, Yippy! It's SMK
 |
| Mmmmm different. |
I know it's been ages since I last wrote a blog, and believe me when I tell you this one took ages to write when I finally got around to it. So sorry for that, and I hope you find this as useful as I did working on it.
 |
| SMK B54-2 multi-pump with 4x32 scope |
Oh the joys of owning a multi-pump air rifle, after learning all the ins and outs of the wonderful .22 Sharp Innova I am totally hyped up over this now obsolete SMK. The only info I have found online is a couple of YouTube entries by 'Weapons Collector' and a couple of sales spread over the last 8 years. So now I can put in my 10 pennies worth to this cheaply made Chinese air rifle.
 |
| Two screws that connect the stock. |
The action is held to the stock by 2 flathead screws, one on the front of the trigger guard and the other onto the support mount for the compression tube and barrel that holds the rear sight.
 |
| Incomplete but still working rear sight |
The stock is made from some awful wood and coated in thick lacquer, it feels as light as balsa wood but is obviously a little tougher.
 |
| Not the best woodwork really. |
The trigger and sear is all in one and the spring to support it is set into the stock , however as direct sears go on explosive valves it is not too heavy a pull. However the trigger is very thin and could do with being a fair bit wider.
 |
| Trigger with it's direct sear |
The ball bearing between the barrel and the loading port will mangle the heads of the pellets if you don't twist the mag anticlockwise, and will end up blocking the barrel up, so you can get away with loading 10 safely into the mag and load the way suggested.
 |
| Ball bearing would be below the loading port in this pic. |
To remove the back of the action, first remove the long screw that holds the metal lug that supports the spring against the sear, then remove the two grub screws that hold the rear of the action to the compression tube, and then remove the bolt and pin.
 |
| Long screw that retains the lug at rear, and one of the two screws that hold the rear action to the compression tube just below the loading bolt. |
The retaining lug, spring, and sear now slide out of the compression tube.
 |
| Lug, spring, sear, magazine with ball bearing, and spring above that. |
 |
| Ball bearing which can go flying! |
It's important to hold the magazine back to the front action as you work the rear action off, as the spring holding the ball bearing for rotating the magazine will go flying.
 |
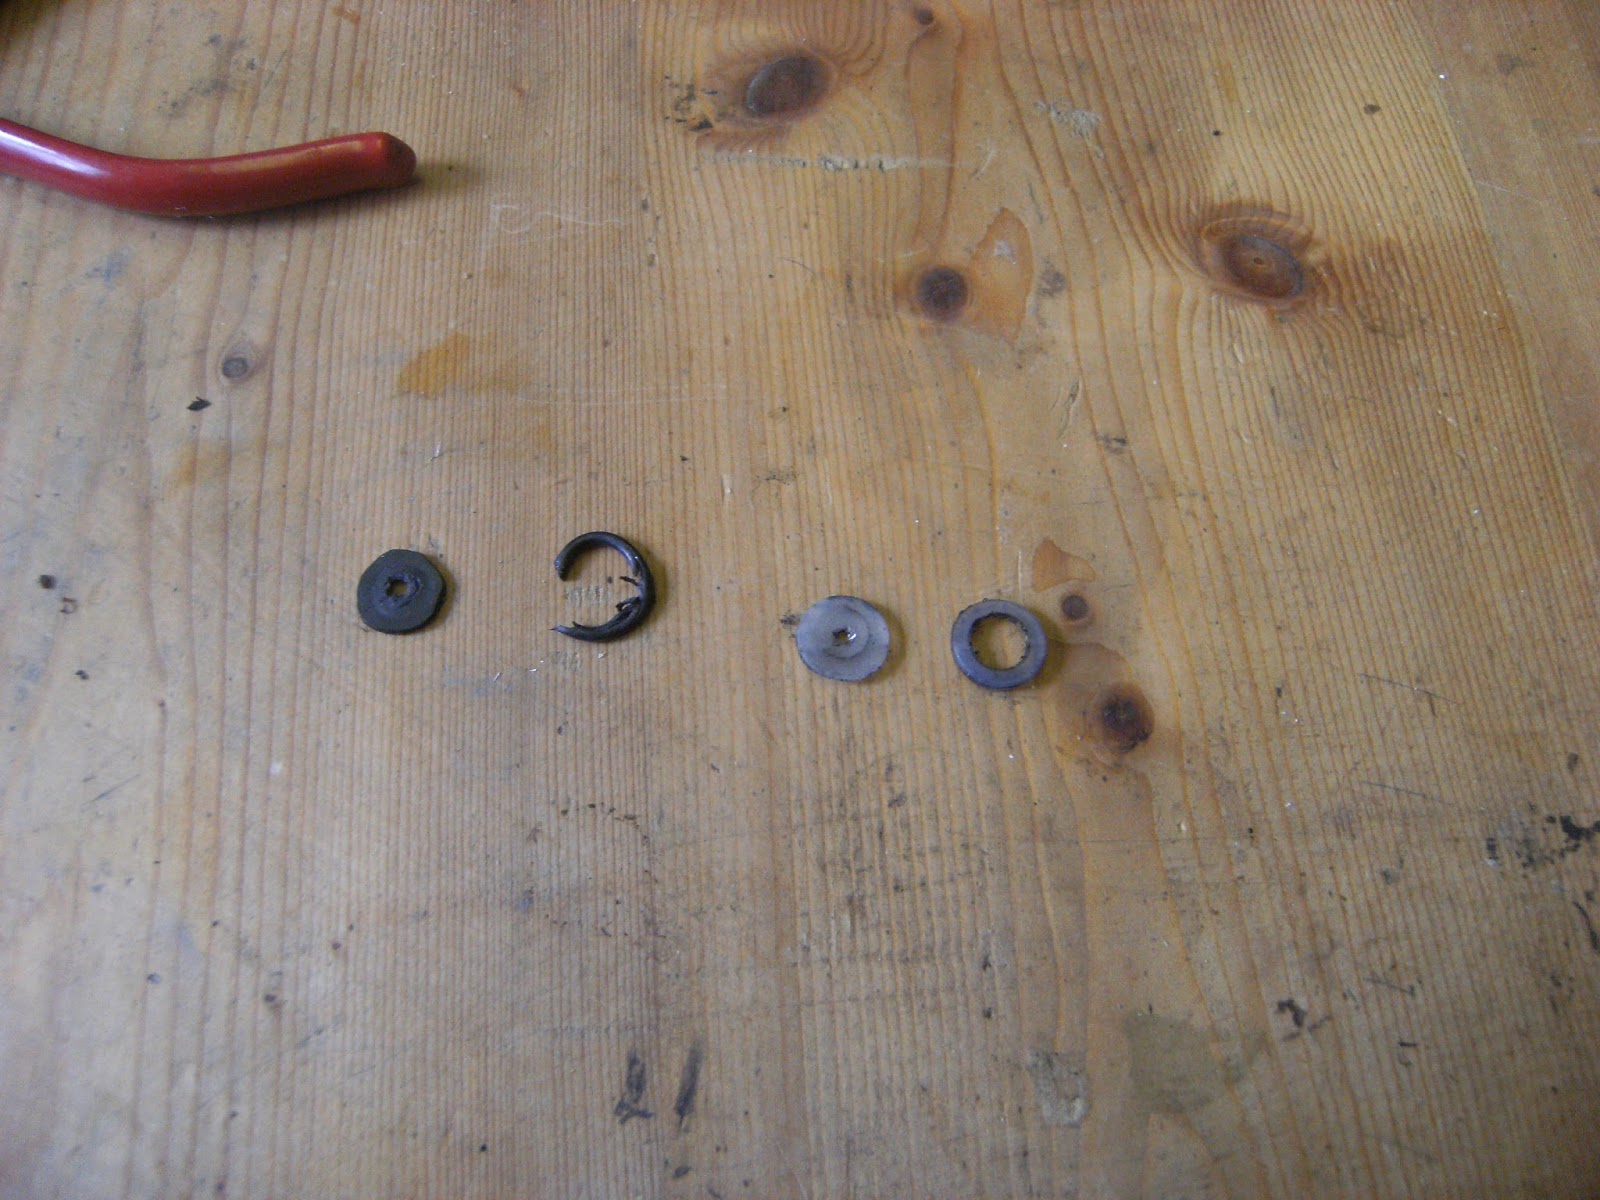
| Bugger! where's that thick washer gone? |
Out comes a thick black nylon washer, then using small thin nose pliers I unscrewed the collar that holds the firing pin housing in place.
 |
| Washers replaced with O rings. |
Originally, rubber washers were used to seal the firing pin housing as all the threads and seatings were set into the compression tube. These were old and crumbling and were one of the reasons it didn't hold air.
 |
| Valve parts fit into here. |
Having recently purchased a large set of metric O rings, I decided to replace them with rubber O rings.
 |
| All the pieces from action, valve, and sear. |
 |
| the little silver screw on the bottom of the front action that holds the firing pin housing in line. |
The firing pin housing is held in place with a screw through the bottom of the action so it lines up correctly with the transfer port. There is a corresponding screw hole on top of the barrel housing.
 |
| Firing pin housing with hole that lines up with transfer port, this runs straight through the housing. |
This gives access to the transfer port which needs no seal due to two seals either side of the firing pin housing.
 |
| washer removed to show O ring seal and firing pin. |
There is an O ring supported by a metal washer in the firing pin housing, sealing the pin.
 |
| Metal disk with nipple holding broken seal. |
With the firing pin housing now sealing the valve chamber, there is a spring that clips onto a metal disk, with a nipple on the other side that a rubber washer clips onto. This presses against a raised collar in the valve chamber and acts as an inlet valve.
 |
| Some inlet valve seals that didn't work. |
The original rubber washer was utterly mashed up, so I made a new one which only lasted 30 shots before the raised collar cut through it. I tried again with something thicker and harder but again it got cut through. Most recently I've used harder rubber with an O ring glued in place so it seals on the outside of the raised collar. Fingers crossed this should hold!
Now, down the pump end there is one butt ugly pump arm, and the components of pump mechanism are made of delrin or some such material, though the pump head itself is in pretty good condition. Adjustment was easy once I tapped a pin out of the pump head holder and screwed it out. A small retaining nut holds it in place to stop it from moving.
 |
| Rubber pump handle can be a bit of a finger pincher. |
There is some side to side play in the pump arm itself but this is only minor, besides, you only need about 6 pumps to get 11 ft/lb.
There is a whole load of stuff I could do to this air rifle as it is pretty accurate with a scope on it, I was pretty impressed considering what I have experienced from old Chinese air rifles before. There's also a lot to play around with to improve it to my own tastes, so when I get around to some i'll let you know.
TTFN.
Best wishes, Wing Commander Sir Nigel Tetlington-Smythe